Embroidery designs can add a touch of elegance, personality, and professionalism to various fabric items, ranging from garments and linens to accessories and home decor. One of the key elements in achieving a polished and visually appealing embroidery project is properly centering the design. Whether you're a seasoned embroiderer or just starting in the craft, mastering the art of centering embroidery designs is essential for achieving professional results. In this comprehensive guide, we'll delve into the best tips and techniques for centering embroidery designs flawlessly on your fabric canvas.
Understanding the Importance of Centering:
Centering embroidery designs serves both aesthetic and practical purposes:
Aesthetic Appeal: Centered designs create a balanced and visually pleasing composition, enhancing the overall appearance of the embroidered item.
Proper Placement: Centering ensures that the design is positioned correctly on the fabric, avoiding awkward or off-center placement that can detract from the finished product's quality.
Tips for Centering Embroidery Designs:
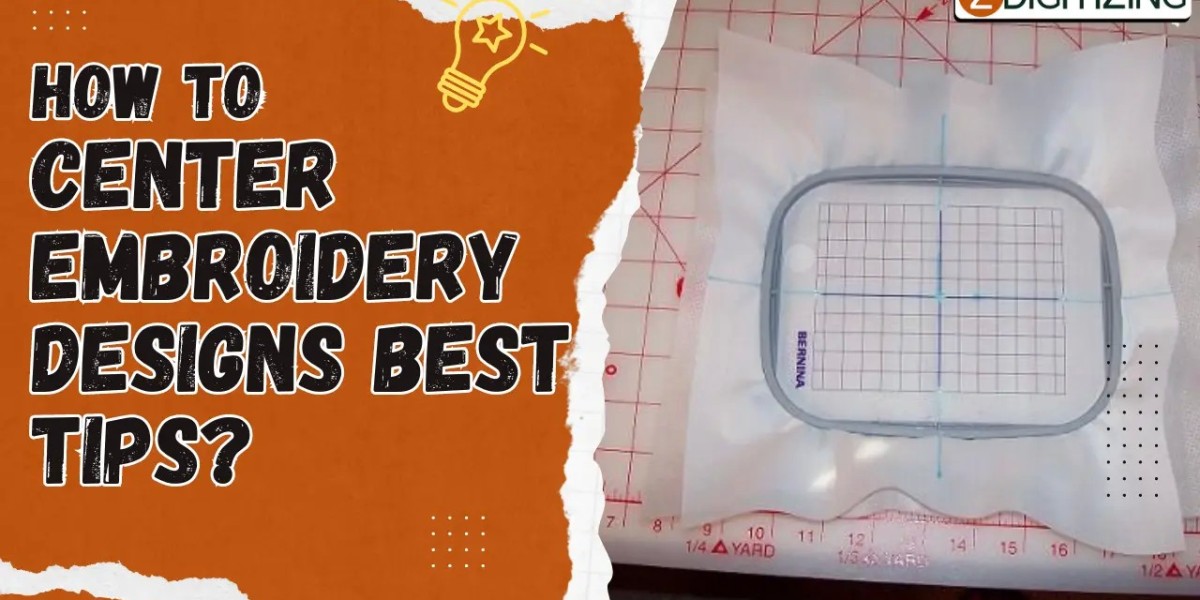
1. Mark the Center Point:
Before starting the embroidery process, mark the center point of the fabric using tailor's chalk, water-soluble markers, or temporary adhesive dots. This reference point will serve as a guide for positioning the embroidery design accurately.
2. Use Embroidery Hoops or Frames:
Secure the fabric in an embroidery hoop or frame to maintain tension and stability during the stitching process. Ensure that the fabric is taut and evenly stretched within the hoop to prevent distortion and shifting of the design.
3. Measure and Align:
Measure the dimensions of the digitizing embroidery design and calculate its center coordinates. Use a ruler or measuring tape to mark the corresponding points on the fabric, aligning them with the center reference point previously marked.
4. Test Stitch-Outs:
Before embroidering the final design, stitch out a test sample on a scrap piece of fabric to verify the placement and alignment. Adjust the positioning as needed to ensure that the design is centered correctly within the designated area.
5. Use Alignment Tools:
Utilize alignment tools and accessories, such as alignment stickers, grids, or laser guides, to assist in centering the embroidery design accurately. These tools provide visual references and guidelines for precise placement and alignment.
6. Consider Design Symmetry:
Take into account the symmetry and balance of the embroidery design when centering it on the fabric. Ensure that the design elements are evenly distributed around the center point, creating a harmonious and well-proportioned composition.
7. Double-Check Before Stitching:
Before starting the embroidery process, double-check the positioning and alignment of the design on the fabric. Ensure that the design is centered correctly and that all elements are aligned as intended before proceeding with stitching.
Techniques for Centering Specific Types of Designs:
1. Text-Based Designs:
For designs that include text or lettering, center the text horizontally and vertically within the designated area. Pay attention to the spacing between letters and words to maintain balance and readability.
2. Symmetrical Designs:
Symmetrical designs, such as mandalas or geometric patterns, can be centered by aligning the central axis or focal point with the fabric's center. Ensure that the design elements are mirrored evenly on both sides for a balanced composition.
3. Asymmetrical Designs:
For asymmetrical designs with irregular shapes or focal points, center the main focal point or visual element within the designated area. Use visual judgment to achieve balance and harmony in the overall composition.
Common Mistakes to Avoid:
1. Off-Center Placement:
Avoid positioning the embroidery design too close to the fabric's edge or corner, as this can create an unbalanced or cramped appearance. Aim to center the design within the fabric's available space for optimal visual impact.
2. Incorrect Measurements:
Ensure accurate measurements and calculations when marking the center point and aligning the embroidery design. Incorrect measurements can lead to misalignment and skewed placement of the design on the fabric.
3. Rushing the Process:
Take your time when centering embroidery designs, and avoid rushing through the process. Careful attention to detail and precision will yield superior results and prevent costly mistakes or rework later on.
Conclusion:
Mastering the art of centering embroidery designs is essential for achieving professional-quality results in your embroidery projects. By following the expert tips and techniques outlined in this guide, you can ensure that your designs are centered flawlessly on the fabric canvas, creating visually stunning and aesthetically pleasing embroidered items. Remember to practice patience, precision, and attention to detail in your centering process, and enjoy the satisfaction of creating beautiful embroidery projects that showcase your skills and creativity.
Zdigitizing
We trust this article might really work out for you. To digitize embroiery plan you would require an expert like ZDigitizing, as digitizing is a mind boggling process.
Zdigitizing is a digitizing embroidery service organization that gives embroidery digitizing service and Vector Art Services all around the world to organizations, ventures, and enterprises. zdigitizing gives fashionable, strong, and sensible custom digitizing and vector craftsmanship administrations. We have been conveying first class digitizing embroidery administrations for 20+ years.
Good News: If you are looking service for convert image to embroidery file, Then ZDigitizing is best choice for you. Zdigitizing is a professional company that provides complete digitizing and vector art services worldwide.